Showing posts with label science. Show all posts

Tuesday, March 6, 2018

All About Space with Tanya of Mars

I have recently met a fantastic local research scientist, Tanya Harrison. She works at Arizona State University, and does all kinds of fancy things with the Mars Rover and outer space. Basically, she's a science rock star and I'm so glad that she was able to come to our library for a program.


March is Women's History Month, so I asked Tanya if she could talk about women in space as part of her presentation. She put together a fantastic PowerPoint just long enough to get the school-age kids in attendance interested, but not so long that they were falling asleep. She talked about the first several women in space, and also briefly about her work at ASU. Here is what I learned that I didn't know before:

Image result for first woman in space

Valentina Tereshkova was the first woman in space, in 1963.

Image result for Sally Ride

Sally Ride was the first American woman in space in 1983.

Image result for Mae Jemison

Mae C. Jemison was the first African-American woman in space in 1992.

Image result for ellen ochoa

Ellen Ochoa was the first Hispanic woman in space in 1993.

After the history of women in space and a short overview of her work, it was time to make a solar system bracelet! It took 20-30 minutes to put the bracelets together, but the kids really enjoyed following the directions in the kit to put together an accurate solar system they can wear. This project unexpectedly doubled as a fine motor skill builder AND an exercise in understanding written directions!

 Image result for solar system bracelet

Finally, thanks to Tanya and ASU, we were lucky enough to be able to raffle off the new American Girl doll to the program participants.

Image result for space american girl doll

Luciana has recently been named the American Girl Doll of the Year for 2018. She wants to be an astronaut when she grows up, so it was the perfect fit for this program. Each child in attendance wrote their name on a sparkly card stock star, and the winner was drawn at the end of the program. The little girl who won was already an American Girl enthusiast, and was really excited to add Luciana to her collection. I love giving away awesome prizes like this!

Overall, an incredibly successful and fun program. I can't wait to have Tanya back for Summer Reading, when she will be a guest at Mad Science!

You can follow Tanya on Twitter @tanyaofmars or visit her website, TanyaOfMars.com

Here is a list of books I pulled for display at the program:

Adult Nonfiction
  • Notable Women Scientists—Pamela Proffitt (ed) 
  • Rise of the Rocket Girls: The Women Who Propelled Us, From Missiles to the Moon to Mars—Nathalia Holt 
  • Hidden Figures—Margot Lee Shetterly 
  • Encyclopedia of Women in Aviation and Space—Rosanne Welch 
Juvenile Nonfiction
  • Women Astronomers: Reaching for the Stars—Mabel Armstrong 
  • Exploring the Solar System: A History with 22 Activities—Mary Kay Carson 
  • Welcome to Mars: Making a Home on the Red Planet—Buzz Aldrin with Marianne J. Dyson 
  • Connie & Bonnie’s Birthday Blastoff—Ray Nelson Jr. and Douglas Kelly 
  • When You Look Up at the Moon—Allan Fowler 
  • Voyager’s Greatest Hits: The Epic Trek to Interstellar Space—Alexandra Siy 
  • Space Encyclopedia: A Tour of Our Solar System and Beyond—David A. Aguilar 
  • Sally Ride: First American Woman in Space—Carole Ann Camp 
  • Ellen Ochoa: The First Hispanic Woman in Space—Joy Paige 
  • To the Stars! The First American Woman to Walk in Space—Carmella Van Vleet and Dr. Kathy Sullivan

Thursday, February 15, 2018

Mad Science: The Science of Sound

Today in Mad Science, we learned all about what makes sound happen. I remembered vaguely that there was a Magic School Bus episode about sound, so I took to the trusty Internet to locate it and show a clip that would explain vibration and sound waves better than I am able to. At the beginning of the program, I showed two videos.


The first video was the Magic School Bus clip I was thinking of. It does a great job explaining how vibration makes sound, and the basics of sound waves. The second video is from The Dr. Binocs Show, one I was not previously familiar with. I like this one because it also goes over vibration and sound waves, but then furthers the discussion by talking about matter and the absence of sound in the vacuum of space.

For our experiment today, we did a mini DIY musical instruments lab. First we made a harmonica out of tongue depressors and rubber bands. I did this as a step-by-step workshop, not telling the next step until everyone had completed the current one. This way, no one got to the end and started playing their harmonica too early.


While it was difficult to teach while the kids were excited about making noise, I opened up a discussion about the construction of our harmonicas. What did the kids think could be done differently to produce a louder sound? A different pitch? What would happen if we removed the paper from inside?

They decided that the paper creates space between the sticks, which is necessary to create a vibration on the rubber band. According to the videos we watched, vibration is required for sound to happen. A couple of them constructed a second harmonica with no paper, and their hypothesis was proved correct!

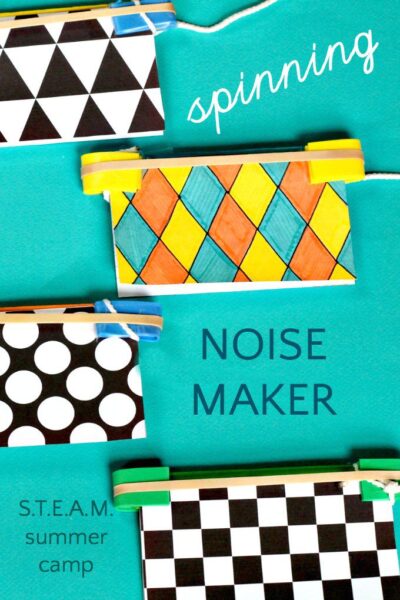
Our second experiment was a buzzing noise maker made with index cards, string, pencil-top erasers, and rubber bands. There is a great entry with a video on What We Do All Day that explains exactly how to make it. I did this project step-by-step as well, and didn't tell the kids that the aim was to spin it and make it buzz until everyone's was complete.

Science experiment for kids. How to make a spinning noise maker.

Like we did with the harmonica, I took a few minutes to talk about why the construction of this instrument works the way it does. We quickly identified the source of vibration, and also like the harmonica, realized that removing the index card stops the vibration, and therefore, the sound.

At the end of the program, we watched the two videos again for the handful of late-comers who missed them at the beginning. The kiddos were delighted to bring their buzzy new toys home, and I officially feel like a science teacher.

Friday, February 2, 2018

Bird Feeder Challenge

February is National Bird Feeding Month! This was a very cool program conceived and planned by Sara, but carried out by me because she was out sick. I actually debated posting it on my blog because this program was not technically mine, but I love the idea and the pictures of all the kids with their finished bird feeders. I figure as long as I don't take credit for the idea, we're good to go.

The Bird Feeder Challenge was a program for school-age kiddos, and had three basic parts. First, we talked about all the aspects that make up a good bird feeder, and why. Second, the kids had some time to make their own bird feeders out of found objects, Crisco (in lieu of peanut butter in case of allergies), and bird seed. Third, each child got a chance to stand up in front of the group and tell us about their bird feeder.

First, we made a list of everything a bird feeder needs to be successful. Here is what they came up with:


I left this list up so they could refer back as they constructed their own feeders. 

The building process:


After the building time was over, some of the kids were reluctant to tell everyone else about their creation. A couple of them preferred to sit instead of stand, but eventually all twelve kiddos told us where the bird(s) stand, how they get their food, and what is special about their creation. 

In addition to being lots of messy fun, there was an important educational element to this program. The actual construction of the bird feeders encourages STEAM concepts such as engineering and architecture. 

If I were to do this program again, the only thing I'd change is taking a little more time at the beginning to talk about bird feeder construction before launching into the list-making. Luckily this group all had a pretty good idea of what a bird feeder is, but not all kids do. This was actually a suggestion made by a mom. I learn something new with every program I present!

Here are some of the kids with their finished bird feeders (posted with parent permission).


Tuesday, November 21, 2017

Preschool Storytime 11-21-17: Puddles the Raindrop

We had a special guest at Preschool Storytime today, the author of the self-published Puddles the Raindrop series!

Image may contain: ocean, outdoor and water

Louise Gabriel has published three adventures of Puddles the Raindrop so far, and has plans for a lot more. They are nonfiction workbooks coupled with the story of Puddles as he travels through the stages of the water cycle. 

As a lot of guest presenters do, Louise asked me to kick off the storytime the way I usually do so the kids have the same structure they are used to. So I did my three-song introduction, which you can view in full here. When I was done, Louise read her Arizona story, Puddles the Raindrop Explores the Grand Canyon State, Arizona

Image may contain: text, nature and outdoor

In the book, there is an illustration of the water cycle that I recreated out of felt and put up on our giant felt board. So after she was done reading the story, we went over the stages of the water cycle with the kids, moving our little felt Puddles as we talked about each one. 

No automatic alt text available.
I made this!

Finally, we passed out a coloring sheet and put crayons out, and gave the kids about 10 minutes to color. The sheet was in the theme also: a rainy desert scene. 

At the end, we sang our goodbye song and had the ritual bubbles. Then Louise stuck around to speak to parents about her book series, sell copies of her book and Puddles plushies, and take pictures with/of me:
Image may contain: 2 people, people smiling, people standing
Me, Louise, and Puddles
Image may contain: 1 person, smiling
Me and Puddles in front of the water cycle
Having guest presenters in storytime can be fun if they are comfortable in front of large groups of children, skilled at public speaking (loudly) and controlling a crowd, and not afraid to get a little silly with us. You would be surprised how many people, even children's book authors, do not possess even one of those three qualities. Luckily, Louise was an excellent storytime guest. We had a lot of fun, and might even have her back when her next Puddles adventure is published!

Wednesday, November 15, 2017

Mad Science: Cranberry Chemistry and Architecture

Once again, in today's Mad Science we had two experiments. The first one focused on chemical reactions, and the second was a hands-on skill builder to practice spatial relations and exercise motor skills. I should note, I did not plan this program on my own. My partner youth librarian Sara is out with an unexpected illness this week, and I have been taking over her programs. She planned this and left me all the materials, so this morning my only job was to read up on the scientific concepts and carry out the program. We did cranberry-theme experiments today, to be festive and Thanksgiving-y.

Here is experiment one: Cranberry Chemistry.

Materials needed:

  • Cranberry juice (unsweetened or no sugar added)
  • Lemon juice
  • Baking soda
  • Clear plastic cups
The lesson for this experiment is to learn about the chemical reactions between acids and bases. It helps to have the visual aid of a pH scale on the wall, and talk to the kids about acidic, basic, and neutral liquids. It also helps to label where the liquids you'll be working with fall on the scale. I labeled where baking soda (9, very basic) and lemon juice (2, very acidic) are. I drew one on the white board, based off this picture:

Image result for ph scale

First, we poured some cranberry juice into our cups and noticed that it is a dark red color. We talked about the fact that cranberries are an acid because they contain anthocyanins. We repeated that word a whole bunch, because it's long and hard to pronounce. I also wrote it on the board so they could sound it out if they were visual learners.

ANTHOCYANINS!

Anthocyanins are pigments that change color depending on whether they are reacting with an acid or a base. Cranberries, and therefore cranberry juice, naturally contain anthocyanins. 

After the cranberry juice was poured, we added a small amout of our base: baking soda. The juice is supposed to turn bright blue; we got as far as a half-hearted purple color. So technically the experiment worked, and it worked well enough to prove the scientific fact of anthocyanins true, but it was not the exciting and vibrant color I had hoped for.

The next step was to add another acid, lemon juice, back to the solution and watch it turn back to it's original red. This also pretty much worked. We did end up with cups full of red liquid again, and were able to discuss how the ANTHOCYANINS reacted with the acid in the lemon juice. 

Here is experiment two: Cranberry Architecture.

Materials needed:
  • Fresh cranberries
  • Toothpicks
The lesson for this experiment was mostly just to have fun. I demonstrated making a simple cube with the cranberries and toothpicks, then invited the kids to make one too. After they all mastered the cube, I gave them about 10 minutes to make whatever they wanted. 

Image result for cranberry toothpick architecture
Source: Little Bins for Little Hands
Then, I issued the kids a challenge: build the highest structure you can that will support the weight of a jumbo marshmallow. I gave them 10 more minutes to alter their creative structure, or tear it down and start something brand new. Then, after everyone was done, I balanced a marshmallow on the highest point of each one. Here is our winner with her giant cranberry tower! If you look closely, you can see that there are actually TWO marshmallows nestled in between the toothpicks. (I did get permission from her guardian for the picture to be posted).


I liked the cranberry architecture because it helps kids of all ages and developmental stages enhance their fine motor skills, motor planning, and spacial relations. It also helps them gain patience with manual projects and maximizes finger dexterity, which will come in handy for crafting, playing musical instruments, and typing. 

Here is the hand out that I sent home with each child, telling them about the experiments we did in case they want to recreate them at home. Click the image for a closer view.

Mad Science is a challenging program for me to host. I have never been very science-minded, so all my scientific information comes from Google and all my ideas for this program come from Pinterest. However, I had a great time working with these kids doing the cranberry experiments today. Programs like this, with more structure and smaller groups of participants, are great because you get more one-on-one time with the patrons. It's more like being a classroom teacher. I've said it before, but that's one big reason why I love being a librarian: you get the best of all educational worlds!

Thursday, October 19, 2017

Mad Science: Halloween Candy Float/Sink and Dissolving Pumpkins

Happy Halloween and happy Mad Science day! Since it's getting close to Halloween, we did two candy-centric experiments in Mad Science today.

When the kids walked into the room, I had it split in half using dividers. On one side of the room there were tables set up with four cups per station, and four candy corn pumpkins in front of the cups. These stations also included a pencil and a half-sheet worksheet that I made (click to see larger image):


After all the kids came in and got settled, I poured a small amount of each liquid into each of their four cups: vinegar, hydrogen peroxide, canola oil, and rubbing alcohol. After everyone had all their liquids, I let them (gently!) drop one pumpkin into each cup.

We talked about what we saw happening right away. Some of the pumpkins were bubbling slightly. Others had turned on their side. Still others had a small amount of their coloring floating off of them already. I asked the kids to make their predictions based on what was already happening to the candy. They all thought the rubbing alcohol pumpkins would dissolve completely in half an hour, but weren't sure about the rest of the liquids.

At this point, we moved to the other half of the room. It was set up with clear tubs filled about halfway with water, a new half-sheet worksheet (click to see larger image), and a selection of wrapped Fun Size candy on the tables. After they chose their stations in the new part of the room, I explained that we would be doing a float/sink experiment while we waited for our pumpkins to change. 

Image result for halloween candy


I talked for a brief moment about density. I don't like to do very intense science lessons in this program, but it is nice to give them some vocabulary words and write them on the board so they know what they're seeing while it's happening. We learned that if something is more dense, it sinks, and if it's less dense, it floats. We talked about what can make an item less dense, like having air pockets or being hollow even if it is solid (a good segue into talking about the Three Musketeers candy later... MillenniaLibrarian thinks ahead :p). 

As a group, we predicted whether we thought the Fun Size Starburst candy would float or sink in the water. I had them circle their prediction, and also took a vote and wrote how many of our group members thought the candy would float vs. sink. We had some food allergies in the group, so it was up to each child whether they would unwrap their candy or not. 

When I tried this experiment earlier today, all the candies sunk except the Three Musketeers, which floats because of their air pockets in its filling. However, I was experimenting with all the candies unwrapped. When I heard a shriek halfway through testing the Starburst, I thought someone had splashed water on themselves. They were actually shrieking from pure delight because their wrapped candy was floating, while their neighbor's unwrapped one had sunk! It didn't even occur to me to try them both wrapped and unwrapped. 

As a group, we figured out that when they were unwrapped, every candy except the Three Musketeers sinks, but all of them float when they are still in the wrapper. The kids decided this must be because of the air trapped inside the sealed plastic wrappers. I love that this happened, because they taught me something I hadn't even considered when planning this experiment. 

After our amazing density discoveries, we came back to our pumpkin cups to judge their progress and fill our our other worksheets. I wasn't able to get any pictures of our experiment, but here is one from the website I lovingly stole the idea for the experiment from, Lemon Lime Adventures:

Source: Lemon Lime Adventures
This is what the pumpkins in the rubbing alcohol and peroxide looked like. I left a few in for another half hour after the program, and they dissolved completely. The oil completely preserved the candy. The vinegar softened it, but did not totally dissolve it in the time allotted.

In the experiment example I followed, the pumpkins were fished out of their liquids and copied in drawings. For my program, we left the pumpkins in, but did draw them after their time in the cups and observe how they changed.
Source: Lemon Lime Adventures

I believe my Halloween candy experiments were a hit with all the 6-12-year-olds who came to my program today. I have to admit that Mad Science isn't my favorite program to run because of the science aspect (I am a humanities girl all the way), and how structured it needs to be in order to work as an hour program. However, the kiddos always have a good time. I will leave you with this cute conversation I had with a third grader after the program.

Kid: Are you a science teacher?
Me: Today I am.
Kid: What about the other days?
Me: I'm a librarian.
Kid: What does that mean?
Me: It means I'm an everything teacher!
Kid: And you give books too?
Me: Yeah, I give books too. 

Thursday, September 21, 2017

Make a Sensory Jar

I got a completely unexpected age group for this program. Scheduling on a weekday morning, I guess I should have realized that the majority of my participants would be under 5 with parents, but I didn't think they would be mostly under three! Even though the project ended up needing more parent help than originally anticipated, we had a lot of fun and the kids left with gorgeous glitter jars.

The point of this workshop was to learn how to make a sensory jar. Even if you don't recognize this craft by name, I'm sure you've seen them if you are even a little bit active on Pinterest, Instagram, Facebook, or if you just plain don't live under a rock. They're also called glitter jars, calm down jars, and about a hundred other names. You fill them up with water, glitter glue, and small objects like sequins or buttons, and then shake them up and watch (hopefully mesmerized) as all the stuff inside settles back down. I wanted to hold this workshop because they are gorgeous but can be difficult to make, and I know they would come in handy with a lot of parents and caregivers.

Image result for sensory glitter jar

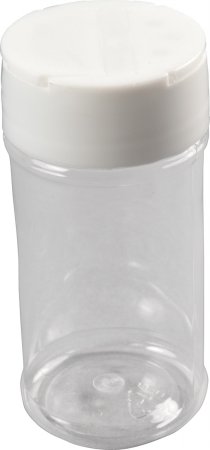
Because I work at the public library and we don't have a budget for full size Voss water bottles and enough stuff to fill them, I ordered twelve 3 ounce plastic spice jars and limited registration to twelve families. The plastic jars were three or four inches tall, and ended up being the perfect size for the little ones to grasp.

Image result for amazon plastic spice jar 3 oz

I laid out glitter glue, loose glitter, sequins, buttons, and heated up a hot glue gun (kept far away from tiny fingers). I also had a kettle of warm water on standby, because glitter glue melts better in warm water. However, the water started off too hot and some of the jars got a little disfigured. Just a little; no leaking, and it was a learning experience.

In addition to making the tiny jars, I sent everyone home with directions that I downloaded from Good to Know, a UK-based crafting blog. I also printed out a simple word document detailing a few of the many uses for a sensory jar at home:

Calm down
Shake it up to get some anger out. Then sit quietly and watch it swirl until all the glitter, water, and objects are still. As the bottle clears, so does the mind. Great for all ages of children and adults.

Time-out timer
Shake it up, and sit in time-out until the jar is completely settled. Great for preschoolers.

Sensory exercises
Make several jars with different objects inside, or varying color schemes. Encourage children to play with them as a form of sensory play. Safe and non-messy, this kind of free form exercise allows children to make sense of how they experience the world through their senses of sight, touch, movement, and balance. Great for children with sensory issues such as an aversion to getting their hands dirty.

Experiencing small objects
Very small children do not often get to use tiny toys because of choking hazards. These jars give them a chance to play with tiny toys safely. Children under 3 can play with their jar and experience tiny toys such as beads, buttons, and loose glitter in a way that is neither harmful nor messy!

Home science lesson

Why do some of the items float and others sink to the bottom? Do the items and glitter in the jar move more quickly in a jar filled with mostly water, or mostly glue? Make a hypothesis. Test it by making several jars with different objects and liquid consistencies in each one. Read science books or websites to find out about density. Come to a scientific conclusion based on your research. Investigate the scientific process while creatively exploring arts and crafts. Excellent exposure to the scientific method for all ages!

Explore all the different ways you can make a sensory jar by searching the internet with phrases such as “glitter jar,” “sensory jar,” “calm down jar,” “discovery bottle,” or “sensory bottle.” There are hundreds of resources out there, and thousands of ways to play and learn!


Of the twelve families who signed up to attend this program, only six showed up. However, all the families had two children with them, so instead of one jar per family, we were able to make one jar per child! 

Some crafters say Voss brand water bottles (glass or plastic) are best for making sensory jars, but others swear by Mason jars or plain old water bottles. I used a glass Voss bottle for my large example, because we happened to have an unclaimed one in the lost and found. I put glitter glue, loose glitter, and buttons inside. The objects all settle at different times which is really satisfying. 

Here is a look at my large sensory jar that I made as an example of what they could make at home, as well as one that one of the kids made during the workshop. The small one contains glitter glue, loose glitter, and sequins. 

Small jar, shaken up

Large jar, settled

Large jar, shaken up

Monday, March 13, 2017

Homeschool Corner: Ladybug Life Cycle

A few weeks ago, Maddog (Madi) noticed our patch of cilantro was starting to get a few aphids on it. We talked about what they were doing there: passively drinking sap from the phloem vessels in the leaf cells (a pretty freaky process in which the aphids puncture the thin phloem cell walls and the sap, which is under high pressure, comes gushing out and is forced into the aphids' food canal. Ick). We also discussed how that can hurt the plant by draining it of water and its sugary energy source, and also opening the plant up to diseases. After a quick google search, we learned that aphids can reproduce--very rapidly--by asexual means, pumping out oodles of clones. Live clones. Which, for the record, makes them viviparous (a term we learned from the really cute Ruth Heller book, Animals Born Alive and Well.)

Anyway, we agreed that the aphid invasion was probably the closest thing to aliens we were ever going to witness up close, which is cool, but also that we should probably get rid of them.

I gave her three options: 
1. Rinse them off with soap and water
2. Spray them with pesticides
3. Wait and see if beneficial insects would move in

She wanted to wait.

So we waited.

And waited.


Annnnnnd waited.

While we waited, we read Eric Carle's classic book The Grouchy Ladybug, about an arrogant ladybug who picks fights with animals of increasing size before deciding that maybe he should just share his aphids after all.

Two days later, we saw our first ladybug.


Then a week and a half after that. . . eggs and larvae and ladybugs, oh my!


We spent an afternoon looking for and photographing all the stages of the ladybug's lifecycle, from egg, to increasingly large larvae, to pupae, to adult. We managed to find everything but a pupa (and in the process, got to watch a larva shed its skin "Just like a snake!" and even see two adult ladybugs making some new ladybug babies.)

Eggs
Larva
Shed larval exoskeleton
Mating adults

That offered us the chance to join in a rousing chorus of the ladybug lifecycle song from Capri+3 that's sung to the tune of The Wheels On The Bus:

Ladybug Life Cycle Song

The ladybug starts out as an egg
As an egg
As an egg
The ladybug starts out as an egg clinging to a leaf.

The egg hatches into a larva
Larva
Larva
The egg hatches into a larva
That sheds skin many times

The larva becomes a pupa
Pupa
Pupa
The larva becomes a pupa
That attaches to a leaf.

Inside the pupa a ladybug is formed
Ladybug is formed
Ladybug is formed
Inside the pupa a ladybug is formed
Until it’s ready to crawl out.


We finally rounded up little brother from the sandbox and headed inside. Maddog found her favorite First Discovery book and we curled up to read Ladybugs and Other Insects, which came from Costco about twenty years ago and was mine as a kid. It's still a great book, though, with transparent pages that let you flip from egg to larva, or show the two pairs of wings that ladybugs have (the hard red outer wings, followed by the transparent inner wings that allow the ladybug to fly). 


And that was more or less the end of our ladybug saga. A few days later, they popped up again as the theme of the daily writing prompt. Here I wrote out the numerals and words for one through five, then drew in ladybugs with a number of spots. She had to count the spots, find the numeral, then write the corresponding word. She then drew her own ladybug and wrote how many spots it had (ten).


The daily prompt is an easy, no-stress way to get writing practice each day, since she recently decided the wanted to work on improving her handwriting. Each morning (or afternoon if Mom isn't on top of her game), we come up with a sentence to copy or a prompt to answer, and put it up on the chalkboard wall in the kitchen. Then during the day while I'm cooking or cleaning, she can come in and work on her writing safely out of her brother's helpful reach, and we can talk about the words and letters and sounds while she writes and illustrates. Sometimes we do the dinner menu, other times we do letter matching or word recognition (I write out sight words all over the board, she writes them in a list in the order I call them out). It lets her have some control over what she's learning, so she's engaged in what she's doing (while still enforcing the basics) and often open-ended enough that it's fuel for conversations for the rest of the day!

UPDATE March 15: We found pupae today! Dozens of them, all at once. We had noticed yesterday that many of the larvae were slowing down and beginning to hang by their butts from the leaves, similar to a caterpillar when it is about to form a chrysalis, so we deduced from our caterpillar watching experience that pupae weren't far behind.

Sure enough, as of this morning, we have about 30 pupae, some which we watched pupate in a jar on the kitchen counter. The pupa shakes itself like you would shake a glowstick to distribute the chemicals that help it dissolve its body so it can reform in its little case as a beetle. Watching them turn from black to opaque to bright yellow as the chemicals distribute, and from there darkening to orange, then red, and developing spots, is an amazing process! It can take anywhere from 3 days to 2 weeks for a ladybug to merge, according to google, and the time it takes is dependent on the ambient temperature (with warmer weather resulting in a faster pupation).

I bet within another day or two we will have new adults to release into the garden!