Showing posts with label sensory. Show all posts

Wednesday, November 15, 2017

Mad Science: Cranberry Chemistry and Architecture

Once again, in today's Mad Science we had two experiments. The first one focused on chemical reactions, and the second was a hands-on skill builder to practice spatial relations and exercise motor skills. I should note, I did not plan this program on my own. My partner youth librarian Sara is out with an unexpected illness this week, and I have been taking over her programs. She planned this and left me all the materials, so this morning my only job was to read up on the scientific concepts and carry out the program. We did cranberry-theme experiments today, to be festive and Thanksgiving-y.

Here is experiment one: Cranberry Chemistry.

Materials needed:

  • Cranberry juice (unsweetened or no sugar added)
  • Lemon juice
  • Baking soda
  • Clear plastic cups
The lesson for this experiment is to learn about the chemical reactions between acids and bases. It helps to have the visual aid of a pH scale on the wall, and talk to the kids about acidic, basic, and neutral liquids. It also helps to label where the liquids you'll be working with fall on the scale. I labeled where baking soda (9, very basic) and lemon juice (2, very acidic) are. I drew one on the white board, based off this picture:

Image result for ph scale

First, we poured some cranberry juice into our cups and noticed that it is a dark red color. We talked about the fact that cranberries are an acid because they contain anthocyanins. We repeated that word a whole bunch, because it's long and hard to pronounce. I also wrote it on the board so they could sound it out if they were visual learners.

ANTHOCYANINS!

Anthocyanins are pigments that change color depending on whether they are reacting with an acid or a base. Cranberries, and therefore cranberry juice, naturally contain anthocyanins. 

After the cranberry juice was poured, we added a small amout of our base: baking soda. The juice is supposed to turn bright blue; we got as far as a half-hearted purple color. So technically the experiment worked, and it worked well enough to prove the scientific fact of anthocyanins true, but it was not the exciting and vibrant color I had hoped for.

The next step was to add another acid, lemon juice, back to the solution and watch it turn back to it's original red. This also pretty much worked. We did end up with cups full of red liquid again, and were able to discuss how the ANTHOCYANINS reacted with the acid in the lemon juice. 

Here is experiment two: Cranberry Architecture.

Materials needed:
  • Fresh cranberries
  • Toothpicks
The lesson for this experiment was mostly just to have fun. I demonstrated making a simple cube with the cranberries and toothpicks, then invited the kids to make one too. After they all mastered the cube, I gave them about 10 minutes to make whatever they wanted. 

Image result for cranberry toothpick architecture
Source: Little Bins for Little Hands
Then, I issued the kids a challenge: build the highest structure you can that will support the weight of a jumbo marshmallow. I gave them 10 more minutes to alter their creative structure, or tear it down and start something brand new. Then, after everyone was done, I balanced a marshmallow on the highest point of each one. Here is our winner with her giant cranberry tower! If you look closely, you can see that there are actually TWO marshmallows nestled in between the toothpicks. (I did get permission from her guardian for the picture to be posted).


I liked the cranberry architecture because it helps kids of all ages and developmental stages enhance their fine motor skills, motor planning, and spacial relations. It also helps them gain patience with manual projects and maximizes finger dexterity, which will come in handy for crafting, playing musical instruments, and typing. 

Here is the hand out that I sent home with each child, telling them about the experiments we did in case they want to recreate them at home. Click the image for a closer view.

Mad Science is a challenging program for me to host. I have never been very science-minded, so all my scientific information comes from Google and all my ideas for this program come from Pinterest. However, I had a great time working with these kids doing the cranberry experiments today. Programs like this, with more structure and smaller groups of participants, are great because you get more one-on-one time with the patrons. It's more like being a classroom teacher. I've said it before, but that's one big reason why I love being a librarian: you get the best of all educational worlds!

Monday, October 30, 2017

Pumpkin Mosaic Art

Since it's October, I hosted a drop-in craft for all ages with the theme of pumpkins. Living in Arizona, it's sometimes hard to remember which season it is by looking outside, because it stays in the 90's well into November and then suddenly drops to the mid-50's until Spring. So, we overcompensate for our lack of weather with extra decorations.


This is the example I made of a mosaic pumpkin. This is a fun art project that you can easily tailor to any age group, which was lucky for me because I had a family with a baby and a preschooler, a set of three pre-teen siblings, and lots in between.

Making a pumpkin mosaic includes four basic steps:
1. Paint a piece of white paper your desired pumpkin color (fun to mix paints and create a custom shade). Wait for it to dry. We had Halloween and Autumn coloring sheets to work on while we waited.
2. Cut your custom painted paper into strips, then cut the strips into triangles, rectangles, and squares.
3. Fit your new shapes onto a construction paper pumpkin and glue them down.
4. Decorate with googly eyes and a Jack-o-Lantern smile!

This project is great for motor skill development because of the painting and cutting with scissors, and also helpful in developing spacial awareness by fitting the pieces together on the pumpkin.

I thought I got some pictures of our awesome final products, but I can't find them now! So instead, here is a .gif of a librarian (and/or model) wearing a dress I wish I owned in front of a photo backdrop I wish I owned, and my promise to be better at taking pictures of adorable children's art in the future.

Thursday, September 21, 2017

Make a Sensory Jar

I got a completely unexpected age group for this program. Scheduling on a weekday morning, I guess I should have realized that the majority of my participants would be under 5 with parents, but I didn't think they would be mostly under three! Even though the project ended up needing more parent help than originally anticipated, we had a lot of fun and the kids left with gorgeous glitter jars.

The point of this workshop was to learn how to make a sensory jar. Even if you don't recognize this craft by name, I'm sure you've seen them if you are even a little bit active on Pinterest, Instagram, Facebook, or if you just plain don't live under a rock. They're also called glitter jars, calm down jars, and about a hundred other names. You fill them up with water, glitter glue, and small objects like sequins or buttons, and then shake them up and watch (hopefully mesmerized) as all the stuff inside settles back down. I wanted to hold this workshop because they are gorgeous but can be difficult to make, and I know they would come in handy with a lot of parents and caregivers.

Image result for sensory glitter jar

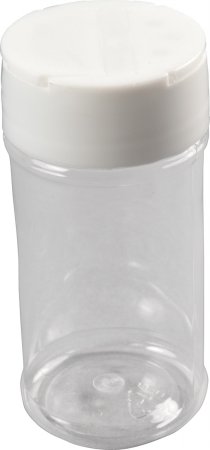
Because I work at the public library and we don't have a budget for full size Voss water bottles and enough stuff to fill them, I ordered twelve 3 ounce plastic spice jars and limited registration to twelve families. The plastic jars were three or four inches tall, and ended up being the perfect size for the little ones to grasp.

Image result for amazon plastic spice jar 3 oz

I laid out glitter glue, loose glitter, sequins, buttons, and heated up a hot glue gun (kept far away from tiny fingers). I also had a kettle of warm water on standby, because glitter glue melts better in warm water. However, the water started off too hot and some of the jars got a little disfigured. Just a little; no leaking, and it was a learning experience.

In addition to making the tiny jars, I sent everyone home with directions that I downloaded from Good to Know, a UK-based crafting blog. I also printed out a simple word document detailing a few of the many uses for a sensory jar at home:

Calm down
Shake it up to get some anger out. Then sit quietly and watch it swirl until all the glitter, water, and objects are still. As the bottle clears, so does the mind. Great for all ages of children and adults.

Time-out timer
Shake it up, and sit in time-out until the jar is completely settled. Great for preschoolers.

Sensory exercises
Make several jars with different objects inside, or varying color schemes. Encourage children to play with them as a form of sensory play. Safe and non-messy, this kind of free form exercise allows children to make sense of how they experience the world through their senses of sight, touch, movement, and balance. Great for children with sensory issues such as an aversion to getting their hands dirty.

Experiencing small objects
Very small children do not often get to use tiny toys because of choking hazards. These jars give them a chance to play with tiny toys safely. Children under 3 can play with their jar and experience tiny toys such as beads, buttons, and loose glitter in a way that is neither harmful nor messy!

Home science lesson

Why do some of the items float and others sink to the bottom? Do the items and glitter in the jar move more quickly in a jar filled with mostly water, or mostly glue? Make a hypothesis. Test it by making several jars with different objects and liquid consistencies in each one. Read science books or websites to find out about density. Come to a scientific conclusion based on your research. Investigate the scientific process while creatively exploring arts and crafts. Excellent exposure to the scientific method for all ages!

Explore all the different ways you can make a sensory jar by searching the internet with phrases such as “glitter jar,” “sensory jar,” “calm down jar,” “discovery bottle,” or “sensory bottle.” There are hundreds of resources out there, and thousands of ways to play and learn!


Of the twelve families who signed up to attend this program, only six showed up. However, all the families had two children with them, so instead of one jar per family, we were able to make one jar per child! 

Some crafters say Voss brand water bottles (glass or plastic) are best for making sensory jars, but others swear by Mason jars or plain old water bottles. I used a glass Voss bottle for my large example, because we happened to have an unclaimed one in the lost and found. I put glitter glue, loose glitter, and buttons inside. The objects all settle at different times which is really satisfying. 

Here is a look at my large sensory jar that I made as an example of what they could make at home, as well as one that one of the kids made during the workshop. The small one contains glitter glue, loose glitter, and sequins. 

Small jar, shaken up

Large jar, settled

Large jar, shaken up