Showing posts with label autumn. Show all posts

Thursday, October 4, 2018

Welcome, Fall! Leaf Art

As the deadline to plan October programs approached, I realized I wasn't doing anything seasonal except the big Halloween storytime we do yearly. In the interest of trying to make myself more excited about Fall (it's getting cold and the trees are dying...yay?) I decided to put together a fun Fall craft program.

We had three stations: crayon rubbings, torn paper trees, and painted leaf prints. I structured this program as a drop-in for an hour and a half, and over 30 people came to make leaf art with me! This was a fun, easy program that I put together with things we already had in our supply room. If you want to recreate it, here is a supply list:

Crayon Rubbings
Crayons
Paper
Leaf Rubbing Plates

Torn Paper Trees
Torn construction paper in Fall colors
Brown construction paper for trunk
White paper for background
Glue sticks
Scissors

Painted Leaf Prints
Washable paint in Fall colors
Paper
Artificial Leaves

Also, it's becoming a wonderful theme that the kids who come to my programs are more creative than I am. Some of them figured out that the Leaf Rubbing Plates also make great paint prints! Here are some of the gorgeous finished products they made.
Torn paper tree and rubbings examples and supplies

Leaf print example and supplies

Artists at work

Artists at work
Finished torn paper tree

Finished leaf prints and paintings

Finished torn paper tree

Finished crayon rubbing

Finished torn paper tree

Finished torn paper tree

Finished art drying after the program

Wednesday, November 15, 2017

Mad Science: Cranberry Chemistry and Architecture

Once again, in today's Mad Science we had two experiments. The first one focused on chemical reactions, and the second was a hands-on skill builder to practice spatial relations and exercise motor skills. I should note, I did not plan this program on my own. My partner youth librarian Sara is out with an unexpected illness this week, and I have been taking over her programs. She planned this and left me all the materials, so this morning my only job was to read up on the scientific concepts and carry out the program. We did cranberry-theme experiments today, to be festive and Thanksgiving-y.

Here is experiment one: Cranberry Chemistry.

Materials needed:

  • Cranberry juice (unsweetened or no sugar added)
  • Lemon juice
  • Baking soda
  • Clear plastic cups
The lesson for this experiment is to learn about the chemical reactions between acids and bases. It helps to have the visual aid of a pH scale on the wall, and talk to the kids about acidic, basic, and neutral liquids. It also helps to label where the liquids you'll be working with fall on the scale. I labeled where baking soda (9, very basic) and lemon juice (2, very acidic) are. I drew one on the white board, based off this picture:

Image result for ph scale

First, we poured some cranberry juice into our cups and noticed that it is a dark red color. We talked about the fact that cranberries are an acid because they contain anthocyanins. We repeated that word a whole bunch, because it's long and hard to pronounce. I also wrote it on the board so they could sound it out if they were visual learners.

ANTHOCYANINS!

Anthocyanins are pigments that change color depending on whether they are reacting with an acid or a base. Cranberries, and therefore cranberry juice, naturally contain anthocyanins. 

After the cranberry juice was poured, we added a small amout of our base: baking soda. The juice is supposed to turn bright blue; we got as far as a half-hearted purple color. So technically the experiment worked, and it worked well enough to prove the scientific fact of anthocyanins true, but it was not the exciting and vibrant color I had hoped for.

The next step was to add another acid, lemon juice, back to the solution and watch it turn back to it's original red. This also pretty much worked. We did end up with cups full of red liquid again, and were able to discuss how the ANTHOCYANINS reacted with the acid in the lemon juice. 

Here is experiment two: Cranberry Architecture.

Materials needed:
  • Fresh cranberries
  • Toothpicks
The lesson for this experiment was mostly just to have fun. I demonstrated making a simple cube with the cranberries and toothpicks, then invited the kids to make one too. After they all mastered the cube, I gave them about 10 minutes to make whatever they wanted. 

Image result for cranberry toothpick architecture
Source: Little Bins for Little Hands
Then, I issued the kids a challenge: build the highest structure you can that will support the weight of a jumbo marshmallow. I gave them 10 more minutes to alter their creative structure, or tear it down and start something brand new. Then, after everyone was done, I balanced a marshmallow on the highest point of each one. Here is our winner with her giant cranberry tower! If you look closely, you can see that there are actually TWO marshmallows nestled in between the toothpicks. (I did get permission from her guardian for the picture to be posted).


I liked the cranberry architecture because it helps kids of all ages and developmental stages enhance their fine motor skills, motor planning, and spacial relations. It also helps them gain patience with manual projects and maximizes finger dexterity, which will come in handy for crafting, playing musical instruments, and typing. 

Here is the hand out that I sent home with each child, telling them about the experiments we did in case they want to recreate them at home. Click the image for a closer view.

Mad Science is a challenging program for me to host. I have never been very science-minded, so all my scientific information comes from Google and all my ideas for this program come from Pinterest. However, I had a great time working with these kids doing the cranberry experiments today. Programs like this, with more structure and smaller groups of participants, are great because you get more one-on-one time with the patrons. It's more like being a classroom teacher. I've said it before, but that's one big reason why I love being a librarian: you get the best of all educational worlds!

Monday, October 30, 2017

Pumpkin Mosaic Art

Since it's October, I hosted a drop-in craft for all ages with the theme of pumpkins. Living in Arizona, it's sometimes hard to remember which season it is by looking outside, because it stays in the 90's well into November and then suddenly drops to the mid-50's until Spring. So, we overcompensate for our lack of weather with extra decorations.


This is the example I made of a mosaic pumpkin. This is a fun art project that you can easily tailor to any age group, which was lucky for me because I had a family with a baby and a preschooler, a set of three pre-teen siblings, and lots in between.

Making a pumpkin mosaic includes four basic steps:
1. Paint a piece of white paper your desired pumpkin color (fun to mix paints and create a custom shade). Wait for it to dry. We had Halloween and Autumn coloring sheets to work on while we waited.
2. Cut your custom painted paper into strips, then cut the strips into triangles, rectangles, and squares.
3. Fit your new shapes onto a construction paper pumpkin and glue them down.
4. Decorate with googly eyes and a Jack-o-Lantern smile!

This project is great for motor skill development because of the painting and cutting with scissors, and also helpful in developing spacial awareness by fitting the pieces together on the pumpkin.

I thought I got some pictures of our awesome final products, but I can't find them now! So instead, here is a .gif of a librarian (and/or model) wearing a dress I wish I owned in front of a photo backdrop I wish I owned, and my promise to be better at taking pictures of adorable children's art in the future.

Thursday, October 19, 2017

Mad Science: Halloween Candy Float/Sink and Dissolving Pumpkins

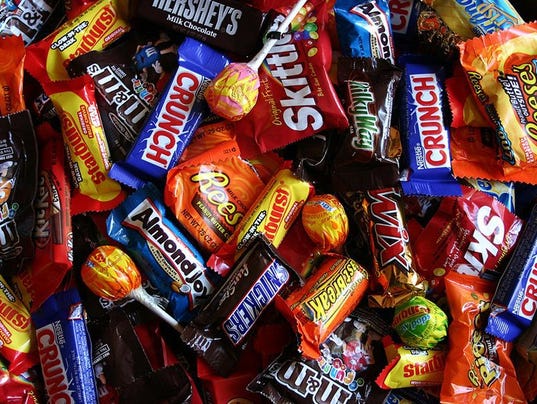
Happy Halloween and happy Mad Science day! Since it's getting close to Halloween, we did two candy-centric experiments in Mad Science today.

When the kids walked into the room, I had it split in half using dividers. On one side of the room there were tables set up with four cups per station, and four candy corn pumpkins in front of the cups. These stations also included a pencil and a half-sheet worksheet that I made (click to see larger image):


After all the kids came in and got settled, I poured a small amount of each liquid into each of their four cups: vinegar, hydrogen peroxide, canola oil, and rubbing alcohol. After everyone had all their liquids, I let them (gently!) drop one pumpkin into each cup.

We talked about what we saw happening right away. Some of the pumpkins were bubbling slightly. Others had turned on their side. Still others had a small amount of their coloring floating off of them already. I asked the kids to make their predictions based on what was already happening to the candy. They all thought the rubbing alcohol pumpkins would dissolve completely in half an hour, but weren't sure about the rest of the liquids.

At this point, we moved to the other half of the room. It was set up with clear tubs filled about halfway with water, a new half-sheet worksheet (click to see larger image), and a selection of wrapped Fun Size candy on the tables. After they chose their stations in the new part of the room, I explained that we would be doing a float/sink experiment while we waited for our pumpkins to change. 

Image result for halloween candy


I talked for a brief moment about density. I don't like to do very intense science lessons in this program, but it is nice to give them some vocabulary words and write them on the board so they know what they're seeing while it's happening. We learned that if something is more dense, it sinks, and if it's less dense, it floats. We talked about what can make an item less dense, like having air pockets or being hollow even if it is solid (a good segue into talking about the Three Musketeers candy later... MillenniaLibrarian thinks ahead :p). 

As a group, we predicted whether we thought the Fun Size Starburst candy would float or sink in the water. I had them circle their prediction, and also took a vote and wrote how many of our group members thought the candy would float vs. sink. We had some food allergies in the group, so it was up to each child whether they would unwrap their candy or not. 

When I tried this experiment earlier today, all the candies sunk except the Three Musketeers, which floats because of their air pockets in its filling. However, I was experimenting with all the candies unwrapped. When I heard a shriek halfway through testing the Starburst, I thought someone had splashed water on themselves. They were actually shrieking from pure delight because their wrapped candy was floating, while their neighbor's unwrapped one had sunk! It didn't even occur to me to try them both wrapped and unwrapped. 

As a group, we figured out that when they were unwrapped, every candy except the Three Musketeers sinks, but all of them float when they are still in the wrapper. The kids decided this must be because of the air trapped inside the sealed plastic wrappers. I love that this happened, because they taught me something I hadn't even considered when planning this experiment. 

After our amazing density discoveries, we came back to our pumpkin cups to judge their progress and fill our our other worksheets. I wasn't able to get any pictures of our experiment, but here is one from the website I lovingly stole the idea for the experiment from, Lemon Lime Adventures:

Source: Lemon Lime Adventures
This is what the pumpkins in the rubbing alcohol and peroxide looked like. I left a few in for another half hour after the program, and they dissolved completely. The oil completely preserved the candy. The vinegar softened it, but did not totally dissolve it in the time allotted.

In the experiment example I followed, the pumpkins were fished out of their liquids and copied in drawings. For my program, we left the pumpkins in, but did draw them after their time in the cups and observe how they changed.
Source: Lemon Lime Adventures

I believe my Halloween candy experiments were a hit with all the 6-12-year-olds who came to my program today. I have to admit that Mad Science isn't my favorite program to run because of the science aspect (I am a humanities girl all the way), and how structured it needs to be in order to work as an hour program. However, the kiddos always have a good time. I will leave you with this cute conversation I had with a third grader after the program.

Kid: Are you a science teacher?
Me: Today I am.
Kid: What about the other days?
Me: I'm a librarian.
Kid: What does that mean?
Me: It means I'm an everything teacher!
Kid: And you give books too?
Me: Yeah, I give books too.