As the deadline to plan October programs approached, I realized I wasn't doing anything seasonal except the big Halloween storytime we do yearly. In the interest of trying to make myself more excited about Fall (it's getting cold and the trees are dying...yay?) I decided to put together a fun Fall craft program.
We had three stations: crayon rubbings, torn paper trees, and painted leaf prints. I structured this program as a drop-in for an hour and a half, and over 30 people came to make leaf art with me! This was a fun, easy program that I put together with things we already had in our supply room. If you want to recreate it, here is a supply list:
Torn Paper Trees
Torn construction paper in Fall colors
Brown construction paper for trunk
White paper for background
Glue sticks
Scissors
Painted Leaf Prints
Washable paint in Fall colors
Paper Artificial Leaves
Also, it's becoming a wonderful theme that the kids who come to my programs are more creative than I am. Some of them figured out that the Leaf Rubbing Plates also make great paint prints! Here are some of the gorgeous finished products they made.
Torn paper tree and rubbings examples and supplies
I wasn't sure what I was getting into with this program, but by the end it turned out to be one of my favorites! The concept was simple: Set out a bunch of random craft supplies and large pieces of butcher paper, and let the kids make whatever they wanted with the intention of beautifying our library.
I had some pre-cut paper pieces in the shape of butterfly wings, rectangles, circles, flower stems (the rectangles and circles can be strategically placed to look like a flower), and triangles. I was delighted to find the kids took these and ran with them! Some copied my sample flowers and butterflies, and others went off the map completely, turning the circles into caterpillars and other incredibly creative things I would never have thought of. This is proof of what I have been saying since last October's Mad Science: children are more creative than I could ever hope to be. That's why I've started structuring my programs a lot less, and just letting them run with the supplies I put out to see what they'll come up with.
I also printed a large banner in 11x17 pieces and set it out on the table for anyone to color. After the program I put the banner together and laminated it to hang up with some of the art. Here are the creative and colorful results:
Some of our first attendees starting their projects
My Sign Language Storytime format is:
Intro and hello
Felt story
Movement song or video
Book
Movement song
Goodbye
This storytime is special for a couple of reasons. First, it's the only one that I give a handout with pictures of the signs on it, so that the kids and grownups can refer to it during storytime and then practice at home. Second, I'm experimenting with adding an AV component to storytime by showing videos to follow along with instead of just listening to songs.
Handout:
Intro and hello: Hello: "Hello Friends"
Before turning on the music, I teach the kids (and grownups) the American Sign Language sign for "friends." Then we boogie, wave, and sing hello to all our friends!
Warming Up Motor Skills: "Open, Shut Them"
On this song we do the movements described in the lyrics: open our hands, close our hands, clap three times, put our hands in our lap, creep our fingers up to our chin, and don't let them in our mouths.
This is a short, easy stretch the kids get a kick out of. While we're stretching, I like to encourage them to reach for the ceiling, touch their toes, then make themselves into a tiny ball.
Felt Story
"Teddy Wore His Red Shirt" (to the tune of "Mary Wore Her Red Dress"
As we sing, I encourage everyone to practice the color signs. Between verses I hold up the next article of clothing and ask the kids what kind of clothes it is and what color it is. Technically the black gloves are supposed to be shoes, but they always think they're mittens so I just go with it.
Teddy wore his red shirt, red shirt, red shirt
Teddy wore his red shirt, all day long.
Teddy wore his blue pants, blue pants, blue pants
Teddy wore his blue pants, all day long.
Teddy wore his yellow hat, yellow hat, yellow hat
Teddy wore his yellow hat, all day long.
Teddy wore his green socks, green socks, green socks
Teddy wore his green socks, all day long.
Teddy wore his black gloves, black gloves, black gloves
Teddy wore his black gloves, all day long.
Teddy without clothes
Teddy with clothes
Video
"Colors" by My Smart Hands
During the video, I encouraged everyone to practice along. I haven't used videos in storytime before, but it seemed to be a welcome activity.
Book
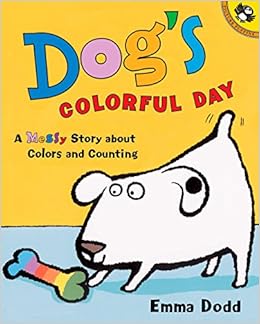
Dog's Colorful Day by Emma Dodd
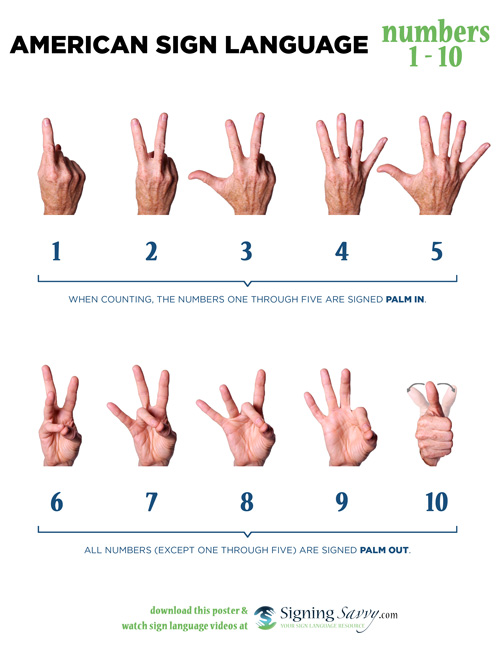
This book is great for colors and counting. Even though the theme of this storytime was colors, I briefly went over how to count to ten in sign language as well.
Movement Song
"I See Something Blue"
Before turning on the music, I explain that the song will tell us which color to look for. When we hear the name of the color, we practice the sign and then hunt for the color somewhere in the room.
Goodbye
"Until We Meet Again" from Out of the Box
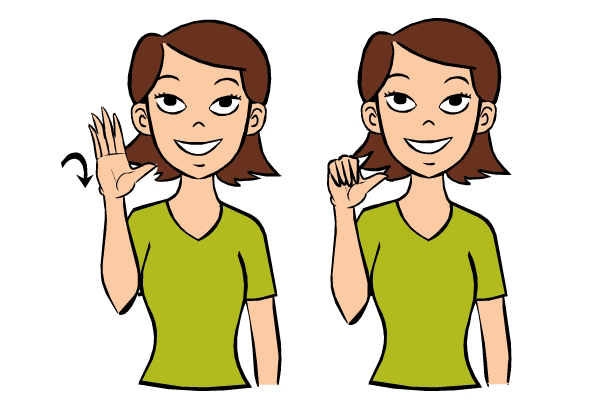
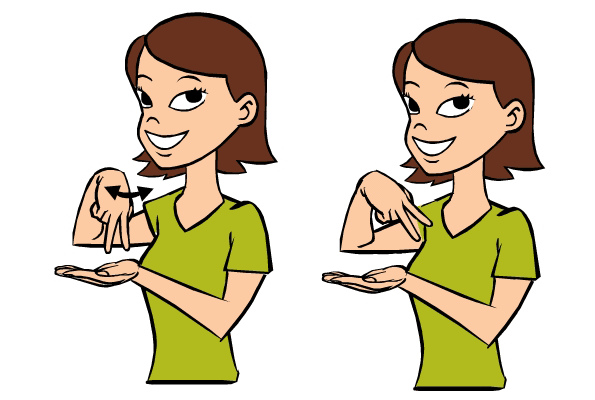
When we sing this song, I help them recall the sign for friends from the hello song, and teach them a couple others as we sing: meet, time, and say.
Friends
Meet
Goodbye
Friend(s)
This is the only storytime that I don't close with bubbles, because directly following is another program called Stay and Play where I set out 4-5 bins of toys for a 30 minute free play. Adding bubbles to that seems to be too much stimulation.
We had a huge group of babies this morning! Usually we have 6-7 babies, each with one grownup. Occasionally two parents bring one baby, or one parent bring 2-3 kids. Today, we had 13 babies, and many of them came with 2-3 adults! It was the biggest Baby Lapsit I've done in a while, and it was also one of the most fun sessions I've ever done.
After our usual introduction, we read I Love Hugs and Kisses by Sandra Magsamen. It worked well for a first book because it only has a few pages, and the illustrations are bright and eye-catching. It was also a good opportunity to identify animals and what sounds they make (if applicable: pandas do not, to my knowledge, make a distinct sound). We had a couple of older siblings in class today, so this worked out well.
Next it was time for our lap bounce journey and it began, as always, with "Bumpy Road." I have a few regulars who have come to Baby Lapsit continuously since their babies were only a couple months old, and they know this chant by heart now. Grownups are instructed to seat their baby facing forward on their laps and bounce along with me as I demonstrate with a roughly baby-sized teddy bear. Here is the chant:
Bumpy road, bumpy road. (Bounce baby on lap)
Smooth road, smooth road. (Move baby smoothly back and forth)
Bumpy road, bumpy road. (Bounce baby on lap)
Smooth road, smooth road. (Move baby smoothly back and forth)
Rough road, rough road! (Bounce baby higher than before)
Bumpy road, bumpy road. (Bounce baby on lap)
Rough road, rough road! (Bounce baby higher than before)
Hole! (Hold baby under armpits and let them fall between your legs)
I tried a new lap bounce today, that went really well: the old children's music standby, "BINGO." I encouraged everyone to sing along, and we bounced babies on our laps for most of the song. At the missing letters, I encouraged them to hold babies up above their heads, or even gently toss them. The babies had a great time, and I could tell the grownups thought it was fun, too!
video
Our second lap bounce song was "Milkshake," one of my favorite storytime songs because it works with all ages. Makes a great lap bounce because you can "stir" baby (similar to the "smooth road" part of the above chant), and of course bounce and gently shake them while making your milkshake.
For our second book we read the board book How Do Dinosaurs Learn Their Colors? by Jane Yolen. The How Do Dinosaurs... series is adorable, and I'm really happy that they published some board books for the series as well. The board books are better for the baby and toddler level, while still engaging for the kiddos.
While reading this book, we learned the signs for all the colors mentioned. I also took the time before class to print out pictures of the signs, so the grownups could follow along with the color signs, and hopefully retain them well enough to practice at home with their baby.
Colors
Red
Purple
Green
Blue
Pink
Yellow
Brown
White
Black
Orange
Rainbow
Our first movement song today was Mr. Jon's awesome version of "If You're Happy and You Know It," tickle bugs and all. We also practiced the sign for "happy" while singing, clapping, stomping, and shouting yippee.
Before singing goodbye, our last movement song was a new favorite of mine, "One, Two Hands." I like to give the parent tip that practicing naming body parts helps babies of all ages start to figure out where their bodies are in space, and how they have control over how they move their bodies. This song is great for practicing body part names.
Then we had our community playtime and said goodbye until next week!
Next on my list of storytime themes is one quite near ad dear to my heart (read my bio on the Welcome page if you're not sure why), dance. After singing hello to our friends, we learned the American Sign Language sign for "dance."
Dance
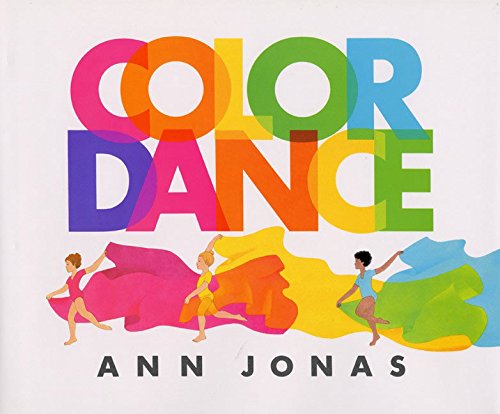
Our first book was Color Dance by Ann Jonas. Even though it's older than I am literally...it was published in 1989), I love this book for storytime. It has simple words, shows the relationships between colors, and gives lots of diversity because it represents children of all colors and genders dancing together. This book would also be great for a color themed storytime.
Next, because of the kids dancing with colorful scarves in the book, we danced with our own colorful scarves! I passed out one per child (and any grownup who wanted one) and we waved them to "Get Ready, Get Set, Let's Dance" by Greg and Steve.
Despite looking all week online and in several print resources, I wasn't able to find a calm-down chant that had anything to do with dance. If you have one, please leave it in the comments! So after we collected the scarves, I used a wonderful song that I have been waiting for the perfect opportunity to use. My one reservation is that the character Joe sings it on Parks and Recreation, and I was a little afraid the parents would recognize it from that. Although I saw a small spark of recognition in one of the regular moms' eyes, but this song went really well and did a great job focusing the kids' attention back on me. I will definitely be using it again.
The second book was Everybunny Dance by Ellie Sandall. It worked out great as a storytime book! First of all, it rhymes, which is always helpful to get littles to pay attention. Second, there are movements you can easily ask the kids to do. Whole pages are devoted to "everybunny" dancing, playing instruments, jumping, and running.
After our second book, I actually paused the storytime action long enough to make a quick craft. We made ribbon dancers today, and I wanted everyone to have theirs to dance with for our last couple of songs. This craft was extremely easy; tongue depressors, clear tape, and short-ish lengths of ribbon I had a volunteer cut for me ahead of time. Not only was it easy and cheap, the kids were absolutely delighted by them. Plus, it only took about five minutes for all 30 kids and their parents to put together.
Our final movement song before saying goodbye was "Everybody Dance" by Teacher Dan. Everyone swinging their ribbons around as this calypso beat played was the most fun I've had all week!
Here is a list of dance books I displayed today:
Everybunny Dance—Sandall
Dance! A Story About Being Happy—Bendall-Brunello
Color Dance—Jonas
Giant Dance Party—Bird
Dance is for Everyone—Zuill
Sock Monkey Boogie-Woogie—Bell
Spunky Little Monkey—Martin
Duck Sock Hop—Kohuth
Cats’ Night Out—Stutson
Dilly Dog’s Dizzy Dancing—DeRubertis
Naughty Toes—Bonwill
The All-American Jump and Jive Jig—Proeller Hueston
Once again, in today's Mad Science we had two experiments. The first one focused on chemical reactions, and the second was a hands-on skill builder to practice spatial relations and exercise motor skills. I should note, I did not plan this program on my own. My partner youth librarian Sara is out with an unexpected illness this week, and I have been taking over her programs. She planned this and left me all the materials, so this morning my only job was to read up on the scientific concepts and carry out the program. We did cranberry-theme experiments today, to be festive and Thanksgiving-y. Here is experiment one: Cranberry Chemistry.
Materials needed:
Cranberry juice (unsweetened or no sugar added)
Lemon juice
Baking soda
Clear plastic cups
The lesson for this experiment is to learn about the chemical reactions between acids and bases. It helps to have the visual aid of a pH scale on the wall, and talk to the kids about acidic, basic, and neutral liquids. It also helps to label where the liquids you'll be working with fall on the scale. I labeled where baking soda (9, very basic) and lemon juice (2, very acidic) are. I drew one on the white board, based off this picture:
First, we poured some cranberry juice into our cups and noticed that it is a dark red color. We talked about the fact that cranberries are an acid because they contain anthocyanins. We repeated that word a whole bunch, because it's long and hard to pronounce. I also wrote it on the board so they could sound it out if they were visual learners.
ANTHOCYANINS!
Anthocyanins are pigments that change color depending on whether they are reacting with an acid or a base. Cranberries, and therefore cranberry juice, naturally contain anthocyanins.
After the cranberry juice was poured, we added a small amout of our base: baking soda. The juice is supposed to turn bright blue; we got as far as a half-hearted purple color. So technically the experiment worked, and it worked well enough to prove the scientific fact of anthocyanins true, but it was not the exciting and vibrant color I had hoped for.
The next step was to add another acid, lemon juice, back to the solution and watch it turn back to it's original red. This also pretty much worked. We did end up with cups full of red liquid again, and were able to discuss how the ANTHOCYANINS reacted with the acid in the lemon juice.
Here is experiment two: Cranberry Architecture.
Materials needed:
Fresh cranberries
Toothpicks
The lesson for this experiment was mostly just to have fun. I demonstrated making a simple cube with the cranberries and toothpicks, then invited the kids to make one too. After they all mastered the cube, I gave them about 10 minutes to make whatever they wanted.
Source: Little Bins for Little Hands
Then, I issued the kids a challenge: build the highest structure you can that will support the weight of a jumbo marshmallow. I gave them 10 more minutes to alter their creative structure, or tear it down and start something brand new. Then, after everyone was done, I balanced a marshmallow on the highest point of each one. Here is our winner with her giant cranberry tower! If you look closely, you can see that there are actually TWO marshmallows nestled in between the toothpicks. (I did get permission from her guardian for the picture to be posted).
I liked the cranberry architecture because it helps kids of all ages and developmental stages enhance their fine motor skills, motor planning, and spacial relations. It also helps them gain patience with manual projects and maximizes finger dexterity, which will come in handy for crafting, playing musical instruments, and typing.
Here is the hand out that I sent home with each child, telling them about the experiments we did in case they want to recreate them at home. Click the image for a closer view.
Mad Science is a challenging program for me to host. I have never been very science-minded, so all my scientific information comes from Google and all my ideas for this program come from Pinterest. However, I had a great time working with these kids doing the cranberry experiments today. Programs like this, with more structure and smaller groups of participants, are great because you get more one-on-one time with the patrons. It's more like being a classroom teacher. I've said it before, but that's one big reason why I love being a librarian: you get the best of all educational worlds!